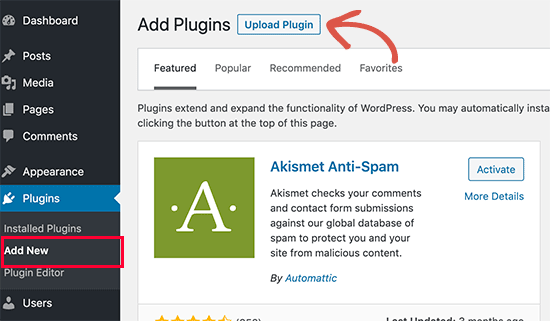
From your WordPress dashboard, navigate to the Plugins section > click Add New.
Here, you have 2 ways to install plugins:
The easiest way of installing a WordPress plugin is to use the plugin search. The only downside of this option is that a plugin must be in the WordPress Plugin Directory which is limited to only free plugins.
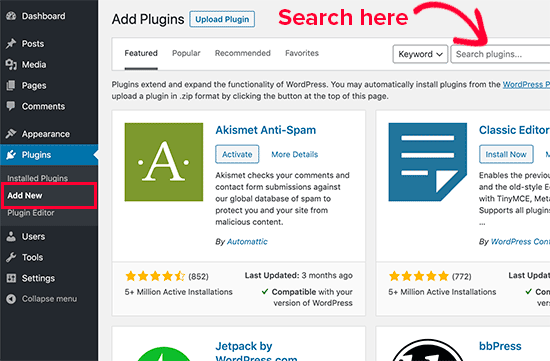
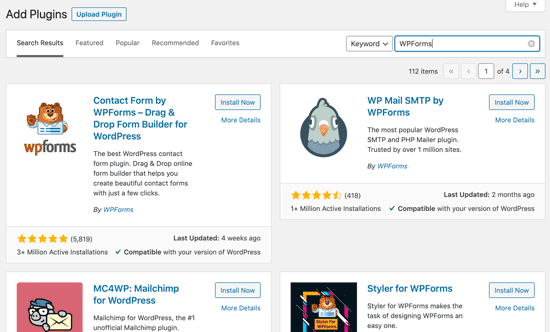
You will see a screen like the one in the screenshot above. Find the plugin by typing the plugin name or the functionality you are looking for. After that, you will see a bunch of listings like the example below:
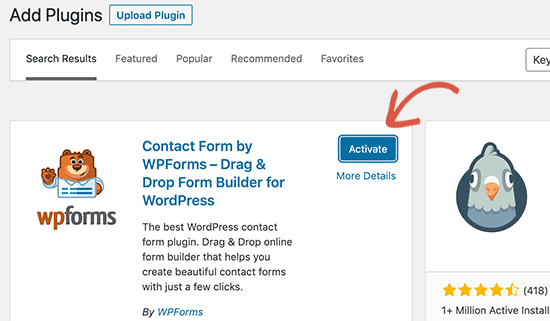
WordPress will now download and install the plugin for you. After this, you’ll notice the ‘Install Now’ button will change into the ‘Activate’ button.
A WordPress plugin can be installed on your site, but it will not work unless you activate it. So go ahead and click on the activate button to start using that plugin.
The second method is by Uploading the plugin. For most paid plugins, this is how you’ll be able to install them. From the Plugins section, simply click on the ‘Upload Plugin’ button at the top of the page.
This will reveal the plugin upload form. Here you need to click on the ‘Choose File’ button and select the plugin file you downloaded earlier to your computer.
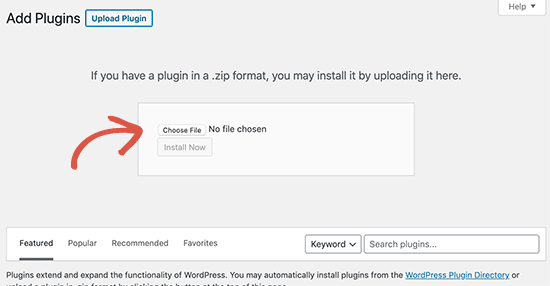
After you have selected the file, you need to click on the ‘Install Now’ button.
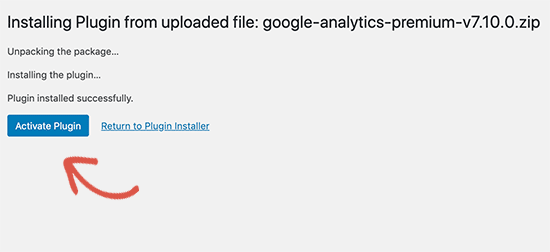
WordPress will now upload the plugin file from your computer and install it for you. You will see a success message like this after the installation is finished.
And just like in the first method, you need to click on the Activate Plugin link to start using the plugin.
